Revamp Your Backyard with Stone Paving: A Comprehensive Guide
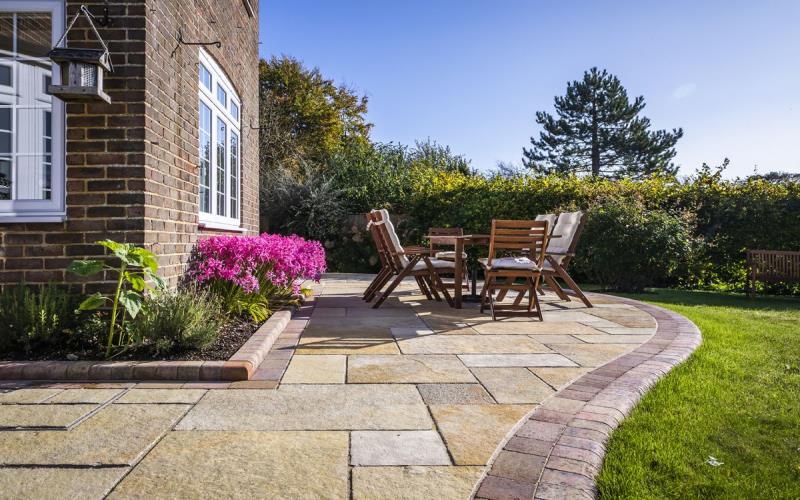
Transforming your backyard can reinvigorate your outdoor space, making it a versatile and stylish area for relaxation and socializing. One excellent way to upgrade your yard is by incorporating stone paving. This timeless and adaptable solution not only enhances the aesthetic appeal but also offers long-lasting durability and minimal upkeep. Here’s a detailed guide to help you through the process of updating your backyard with stone paving.
Planning and Design
Before starting your project, thorough planning is essential. Begin by evaluating your backyard’s current condition and envisioning your desired outcome. Consider these key points:
- Purpose: Define how you want to utilize the space. Are you aiming for a dining area, a cozy fire pit zone, or a picturesque pathway through your garden?
- Layout: Draft a basic design of the area you plan to pave. This will help you visualize the final look and estimate the quantity of materials needed.
- Style: Stone paving slabs offer a variety of styles, such as flagstone, slate, or cobblestone. Select a style that harmonizes with your home’s architecture and reflects your personal taste.
Selecting the Right Stone
The choice of stone significantly affects both the appearance and functionality of your space. Here are a few popular types:
- Flagstone: Known for its natural charm and range of colors, flagstone is perfect for achieving a rustic ambiance.
- Slate: This material offers a sleek, modern look with its smooth surface, ideal for contemporary designs.
- Cobblestone: With its old-world appeal and durability, cobblestone pavers add a classic, enduring touch to any area.
Evaluate each stone’s durability, maintenance needs, and suitability for your local climate.
Preparing the Site
Proper site preparation ensures a smooth paving process:
- Clear the Area: Remove any grass, plants, or debris from the paving site.
- Level the Ground: Ensure the surface is even. This might involve digging and filling to achieve a flat base.
- Install a Base Layer: Lay a foundation of crushed stone or gravel to provide stability and aid in drainage. Compact this layer thoroughly to create a solid base.
Installing the Stones
Once your site is ready, you can start laying the stones:
- Dry Layout: Arrange the stones on the ground without mortar to see how they fit together. This allows you to make any necessary adjustments before final installation.
- Placement: Begin placing the stones according to your design. Ensure they are level and fit tightly against one another. Use a rubber mallet to adjust them into place.
- Filling Gaps: After all stones are laid, fill the gaps between them with sand or gravel. Sweep the material into the joints and compact it to secure the stones.
Adding Finishing Touches
To complete your backyard update, consider these final steps:
- Seal the Stones: Apply a stone sealer to protect your paving from stains and weather damage. This step is optional but recommended for enhanced durability.
- Enhance the Space: Add outdoor furniture, planters, or lighting to boost the functionality and aesthetic appeal of your newly paved area.
Maintenance
Maintaining your stone paving is straightforward. Regularly sweep away debris and periodically inspect the surface for any shifting or uneven stones to ensure it remains in excellent condition. Addressing any issues as they arise will help prevent more significant problems down the line.
Conclusion
Updating your backyard with stone paving is a fulfilling project that can elevate your outdoor space into a beautiful and functional retreat. With thoughtful planning, selecting the right materials, and proper installation, you’ll create a stunning area that enhances your home and provides lasting enjoyment for years to come.